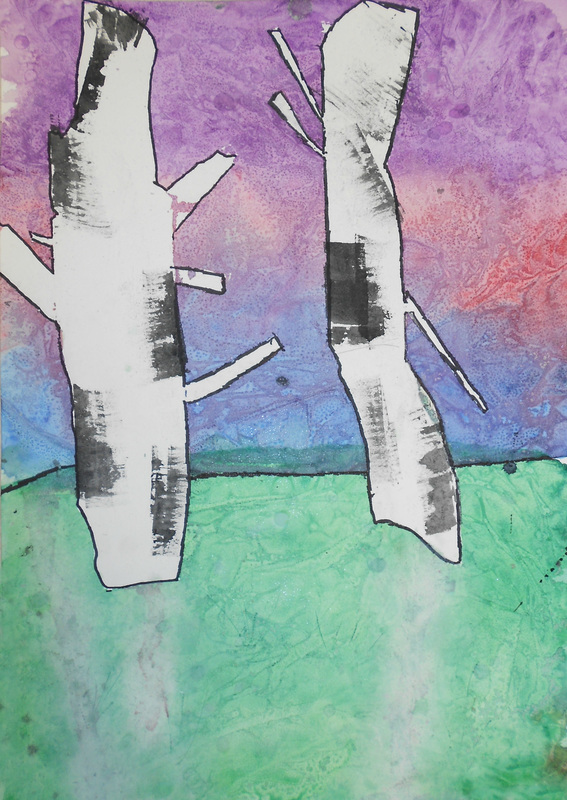
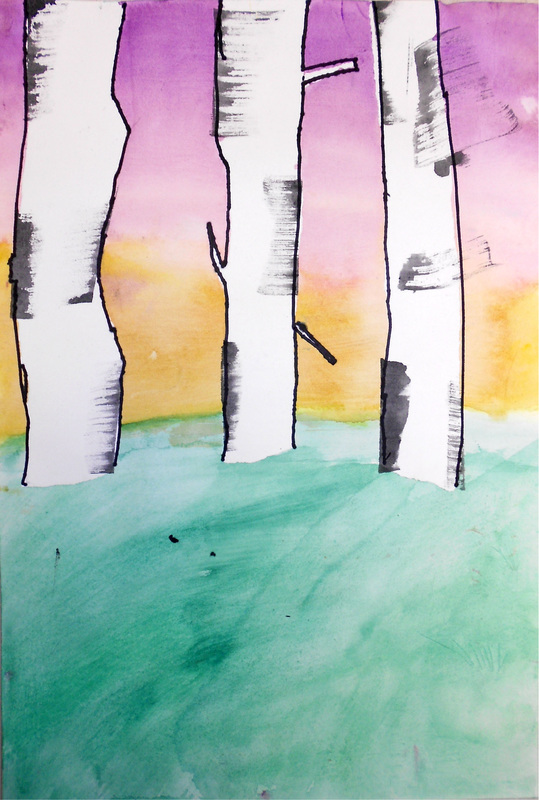
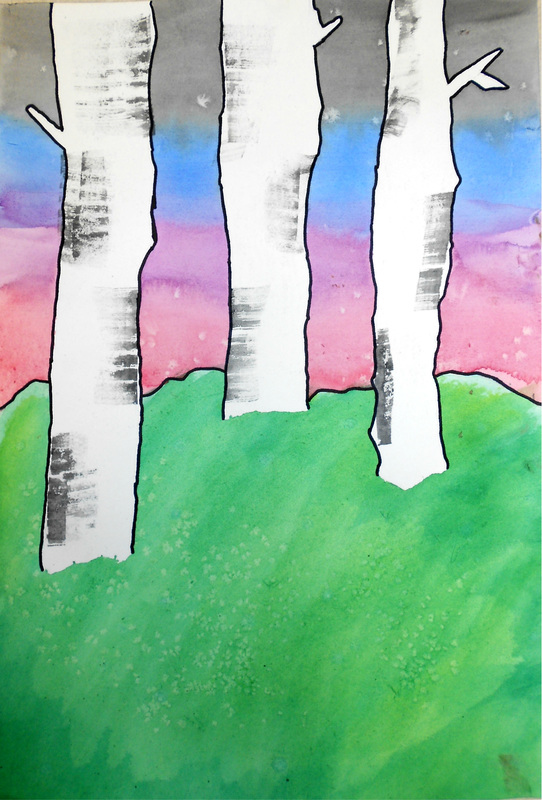
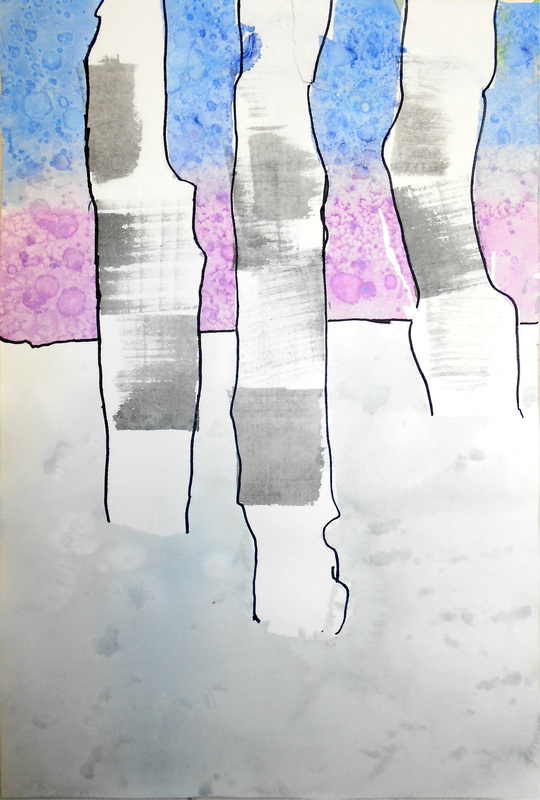
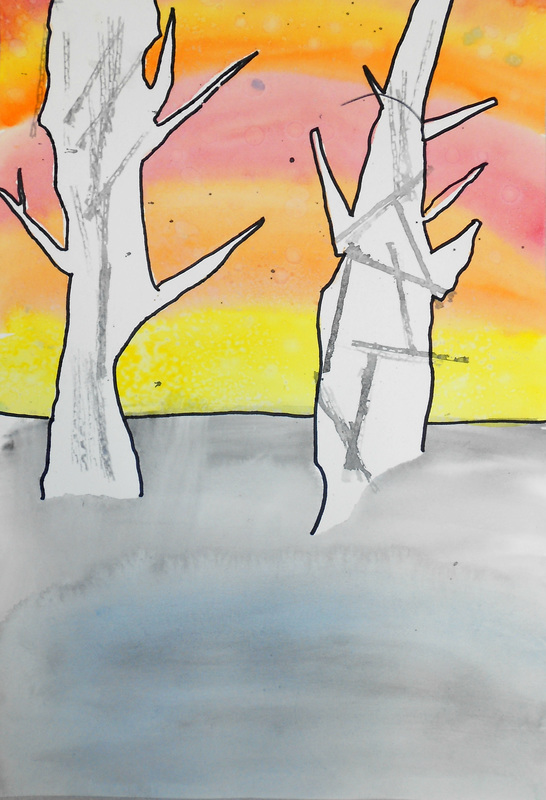
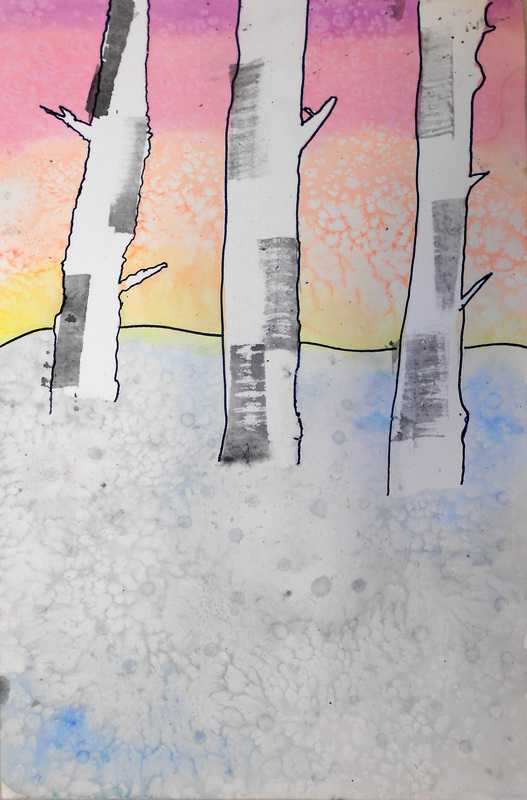
The 5th graders moved onto their texture unit by looking at the art of Claude Monet. They learned what it means to have texture and saw how Monet's paintings used thick brush strokes to create a variety of textures. Some areas of his paintings showed small quick brush strokes while others areas had smoother longer brush strokes. Since Monet was an Impressionist painting, color and light was very important in his art. They discussed the differences in light and color in a series of four paintings of Birch trees. They also discussed what the differences of light and color told us about the time of day and the time of year that the painting was made. With this watercolor painting project, the students had to decide what time of the day or year they wanted their birch trees to be in.
Before even beginning their tree painting, the students experimented with creating 10 different watercolor techniques to create implied texture. These techniques include wet-on-wet, dry brushing, variegated wash, graded wash, Scraffito, salt, rubbing alcohol, saran wrap, lift off, and splatter paint. This may have been difficult for the students at first but it was good practice for their final painting. Although I do not expect each student to remember or master all 10 techniques, my goal was to have students become comfortable with a select few watercolor techniques that they will be using in their final painting.
The students began their Birch tree picture by tearing the edges of masking tape to create a ragged edge on either side of the tape. This torn piece of tape was laid onto their paper where they wanted their trees to be. It was important for the trees to start higher up on the paper and go past the top of the paper to make it look like the trees were taller than our view. If they wanted, the 5th graders placed the left over thin pieces of tape onto their tree trunks to create branches. When they were ready to move onto watercolors, they were sure to paint the ground first to make sure that the horizon line went above the trees. This is when they chose a watercolor technique to represent the ground, whether they were making flakey snow or bristly grass. On another day, once the ground has dried, the 5th graders moved onto the sky. Many students chose the variegated wash in the sky by blending one color into another. Some students took this one step further and included an additional watercolor technique along with the variegated wash. With the ground and the sky painted, the painting was ready to have the tape removed. After having the tape removed, it was apparent that the watercolor did not stick to the areas were the tape had been, leaving white for the Birch trees. The students used Sharpie to outline the horizon line and the trees to help them pop out from the page. For a final touch, the students took squares of cardboard, painted black watercolor paint on the corrugated part of the cardboard, and scraped it across areas of the tree to make them look a bit more like Birch trees.
This was a challenging project for the 5th graders. They really had to push themselves in working with such complicated painting techniques but we had many beautiful paintings when everything was done. The students definitely impressed me as well as themselves with how these Monet inspired Birch tree paintings turned out.